
ISPF PS File Management
A Physical Sequential (PS) in ISPF mainframe is like a file that contains data used for processing. PS File Management in ISPF allows users to view, edit, delete, rename, move and copy data within a PS.
Navigation -
Step-1: Option 3.4 (Data Set List Utility) from ISPF Primary Option Menu (ISPF Home Menu).
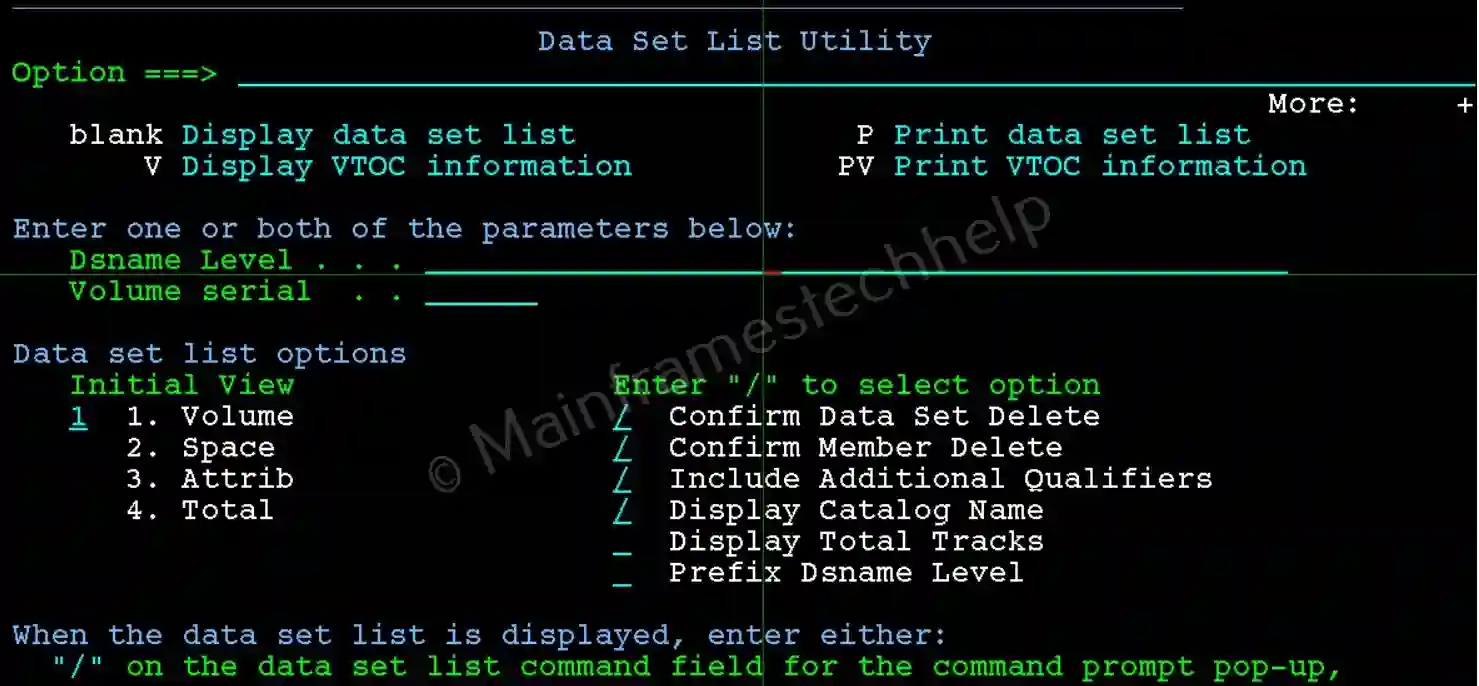
Step-2: From the Data Set List Utility panel, enter the PS in the Dsname Level field. Press Enter.
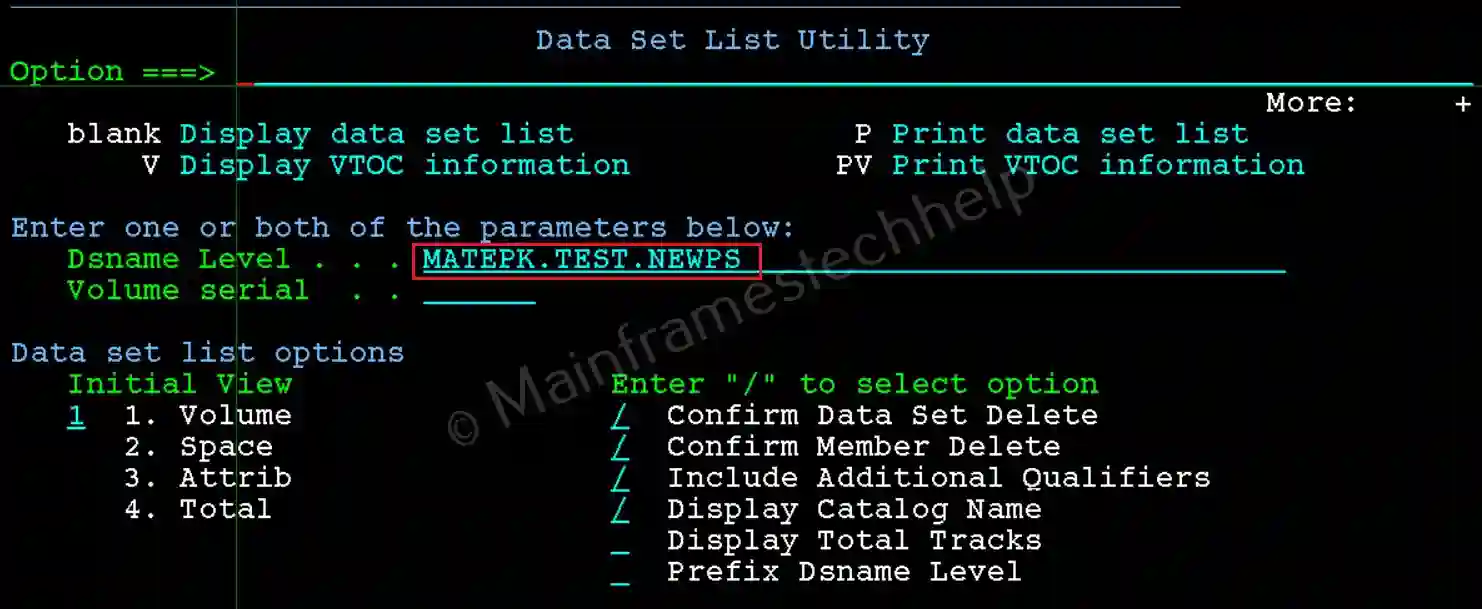
Step-3: If the dataset name is found in the system catalog the data set will display in DSLIST screen like below -

View PS -
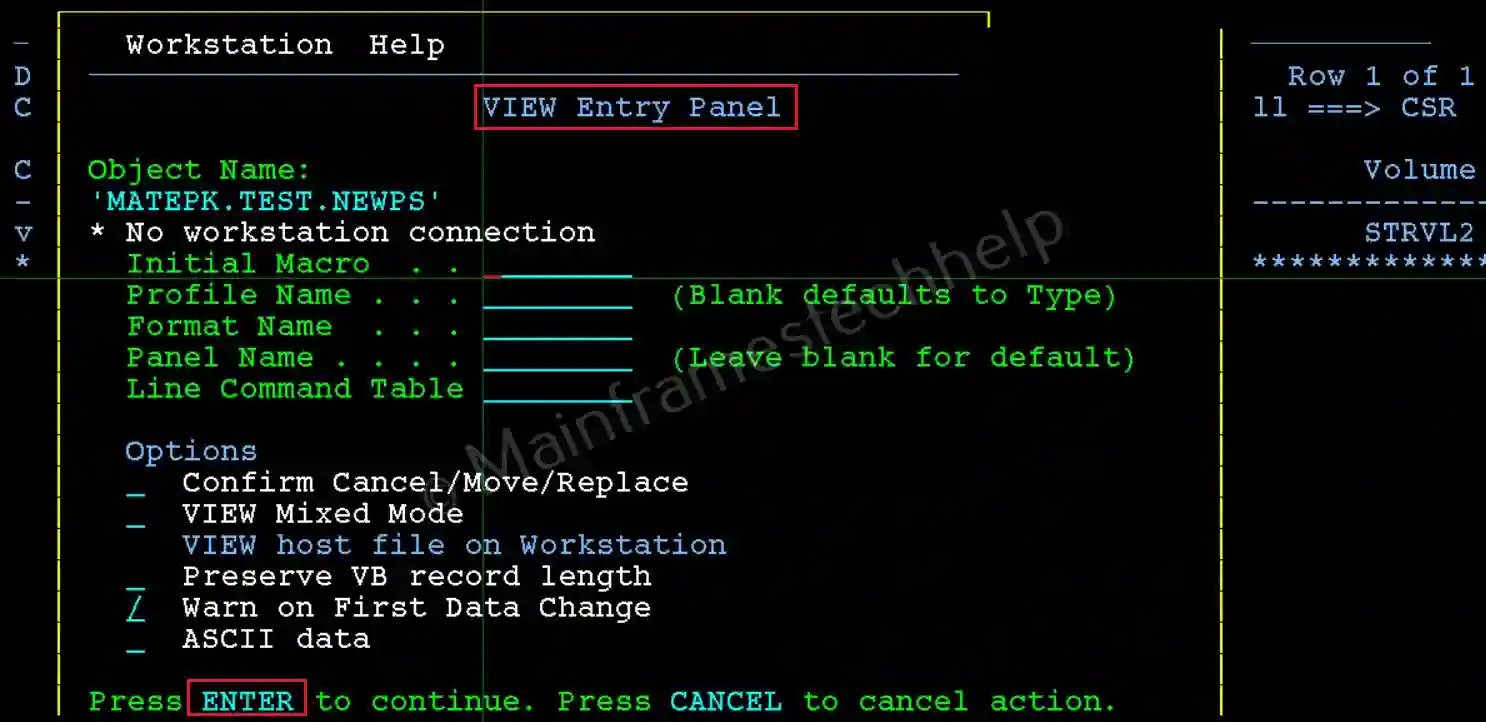
Step-1: From the Data Set List Utility screen, Enter "V" (View mode) infront of the PS file name.

Step-2: VIEW Entry Panel appears for view confirmation. Press Enter to continue.
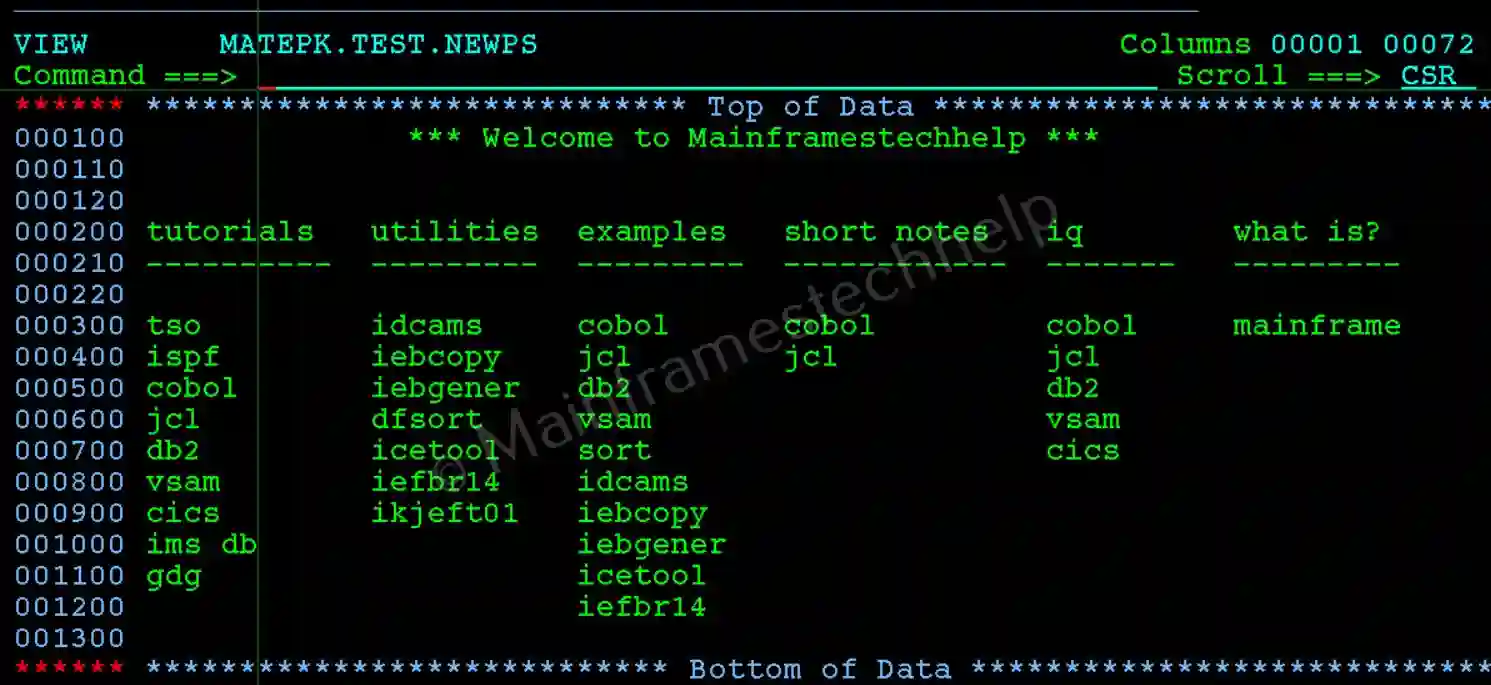
Step-3: It displays all the contents of the PS file.
Edit PS -
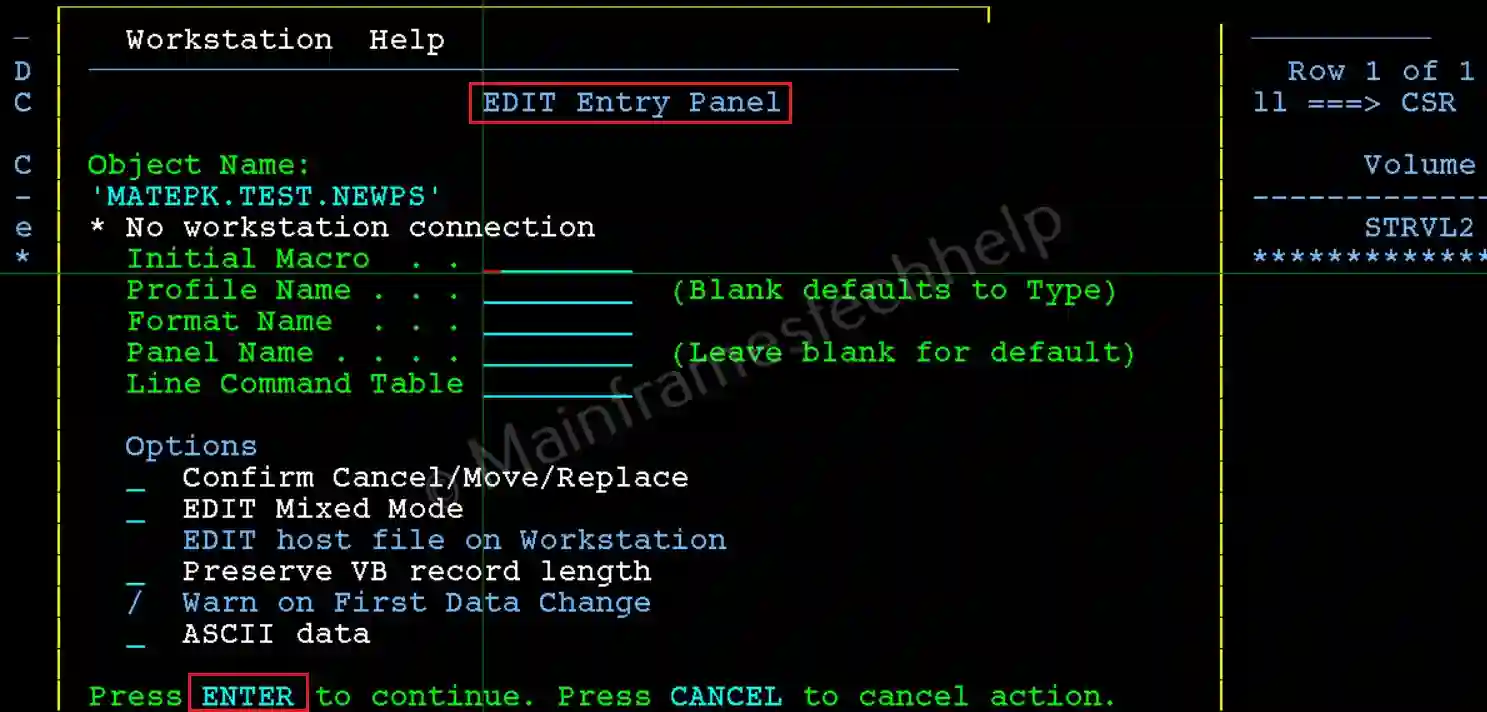
Step-1: From the Data Set List Utility screen, Enter "E" (Edit mode) infront of the PS file name.

Step-2: EDIT Entry Panel appears for edit confirmation. Press Enter to continue.
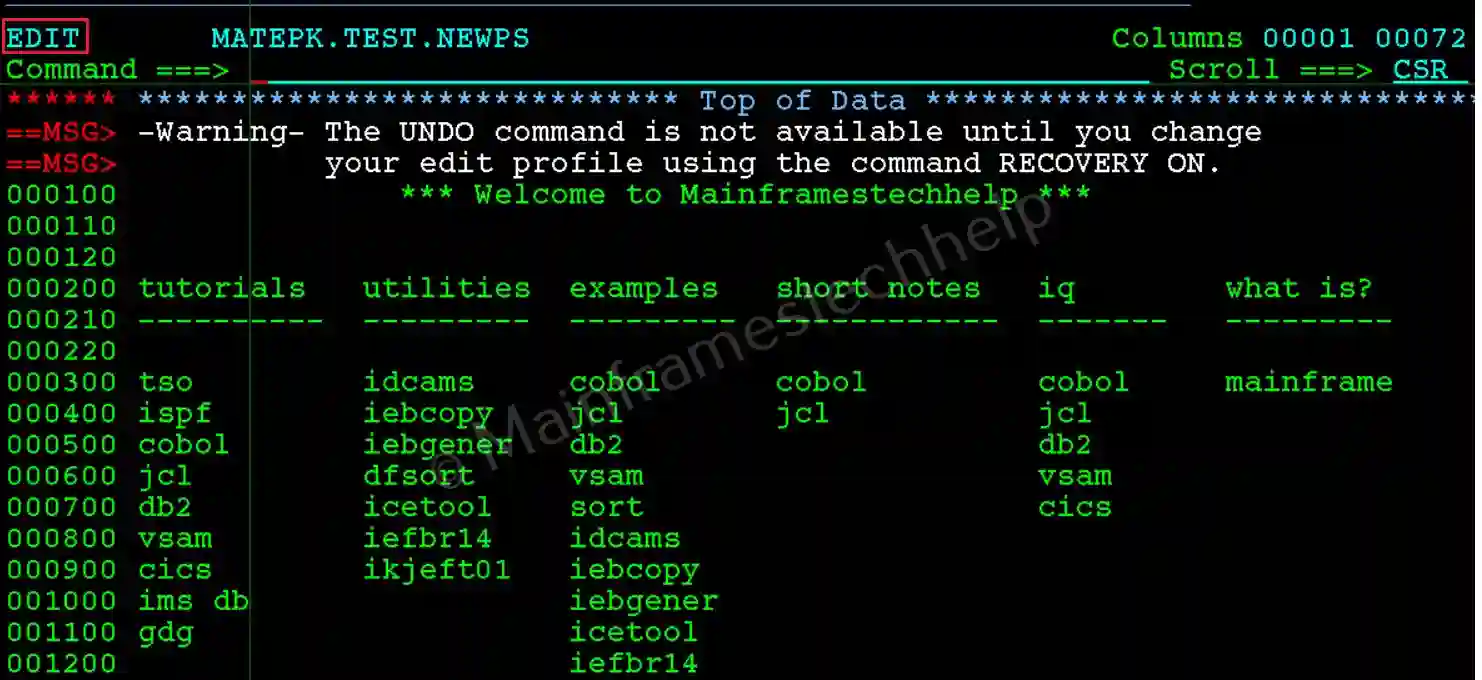
Step-2: It displays all the contents of the file.
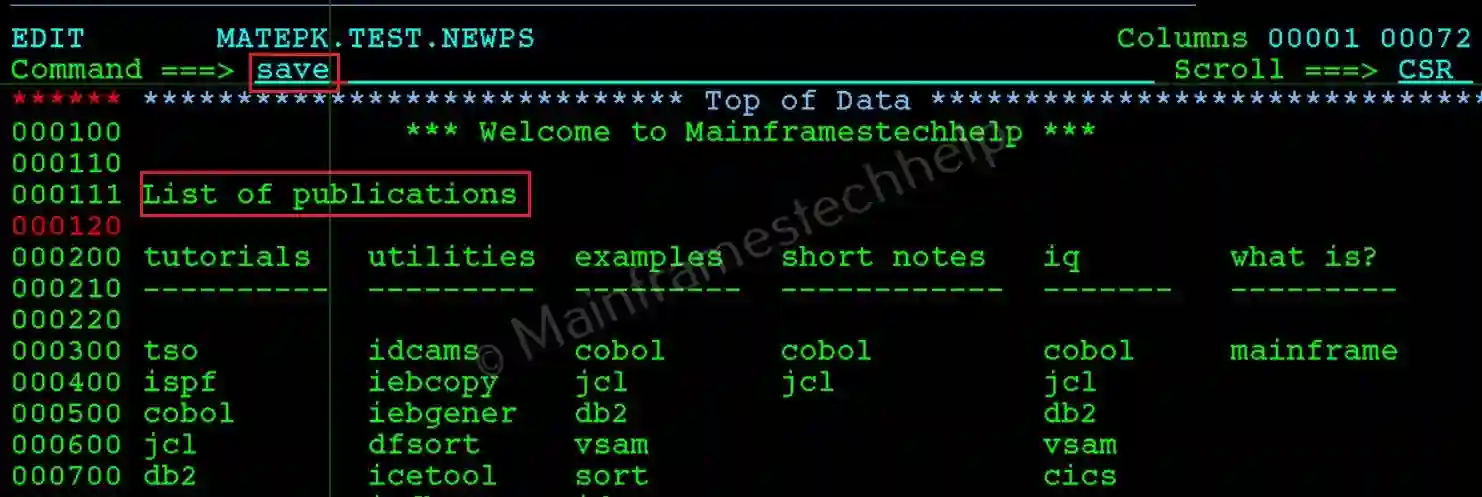
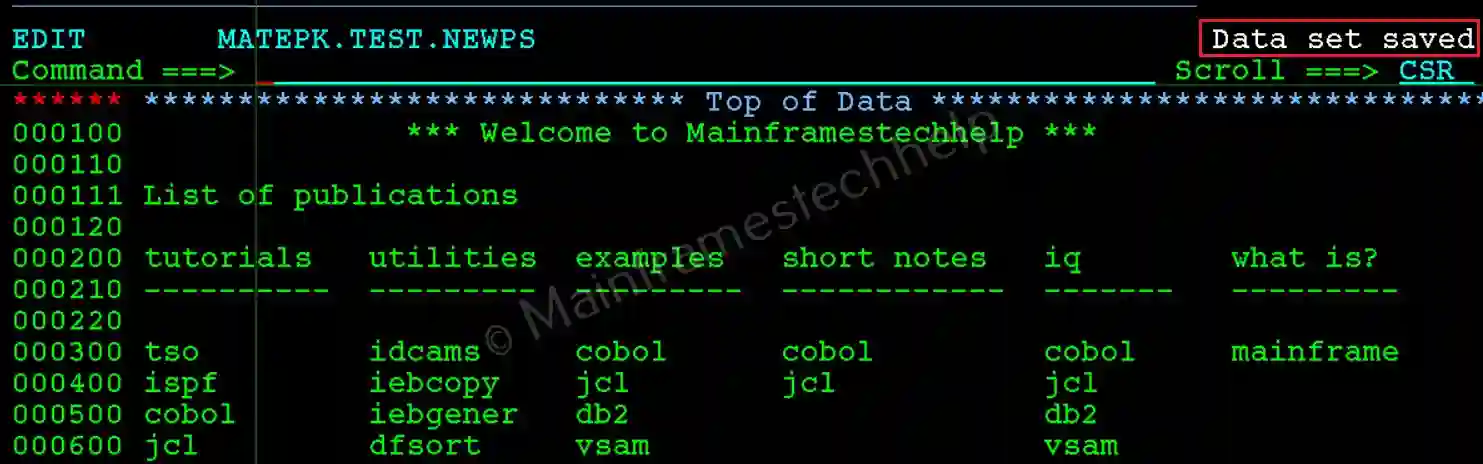
Step-3: Add the code to it and enter the command Save to save the contents in the file.
Rename PS -
Step-1: From the Data Set List Utility screen, Enter "R" (Rename mode) infront of the PS file name.

Step-2: The popup panel appears and asks for the new PS file name. Provide the new PS name and hit Enter.

Step-3: If the rename is successful, "Data Set Renamed" displays on the right-top corner.

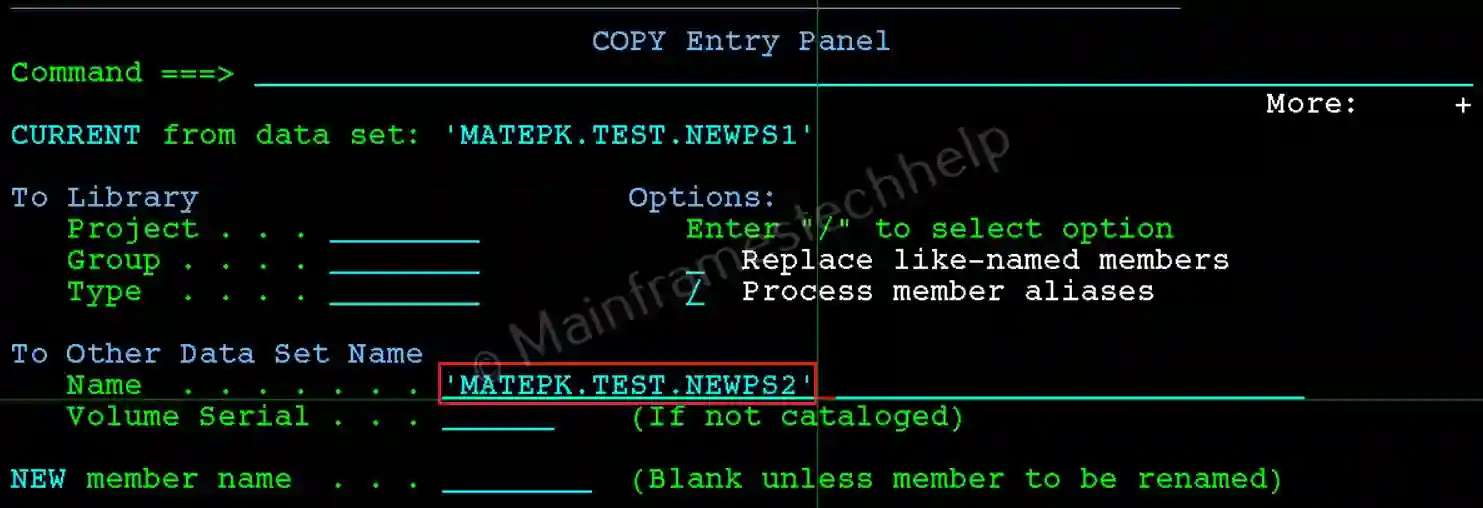
Copy PS -
Step-1: From the Data Set List Utility screen, Enter "CO" (Copy mode) infront of the PS file name.

Step-2: In the next screen, provide the target PS name. Hit Enter to copy the file.
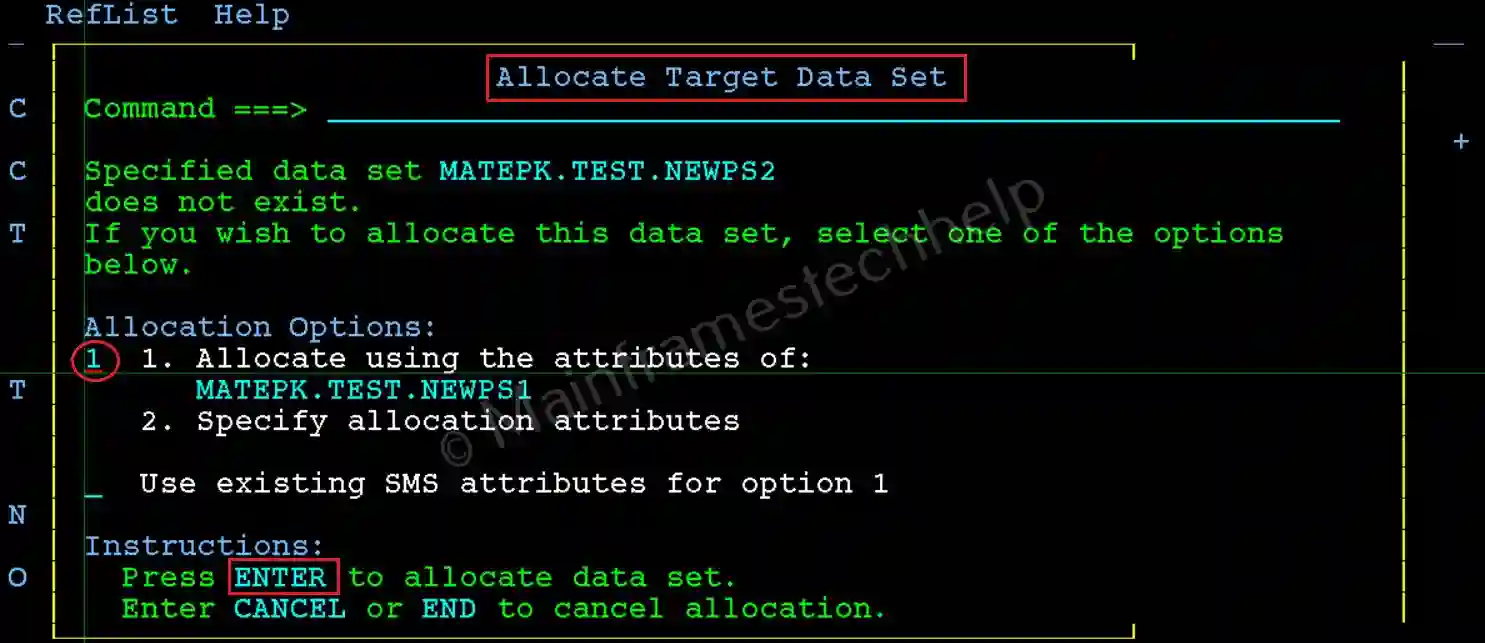
Step-3: Allocate Target Data Set popup apprears. Choose the best allocation option and hit Enter.
Step-4: If the copy is successful, "Data Set - Copied" displays on the right-top corner.

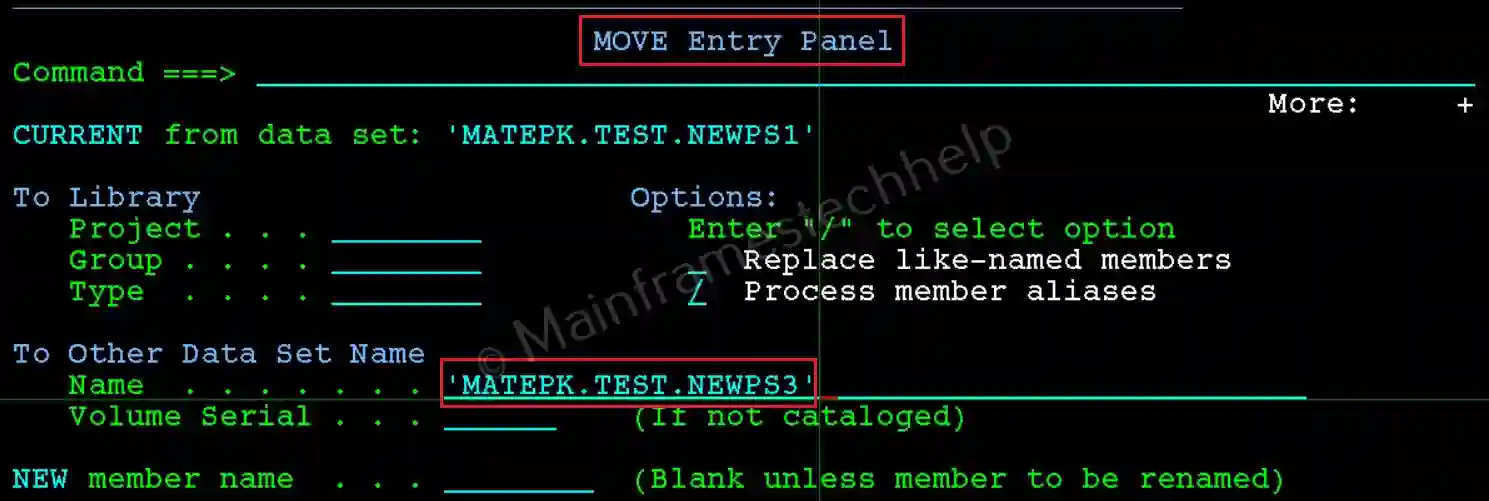
Move PS -
Step-1: From the Data Set List Utility screen, Enter "MO" (Move mode) infront of the PS file name.

Step-2: In the next screen, provide the target PDS name and target member name. Hit Enter to move the member.
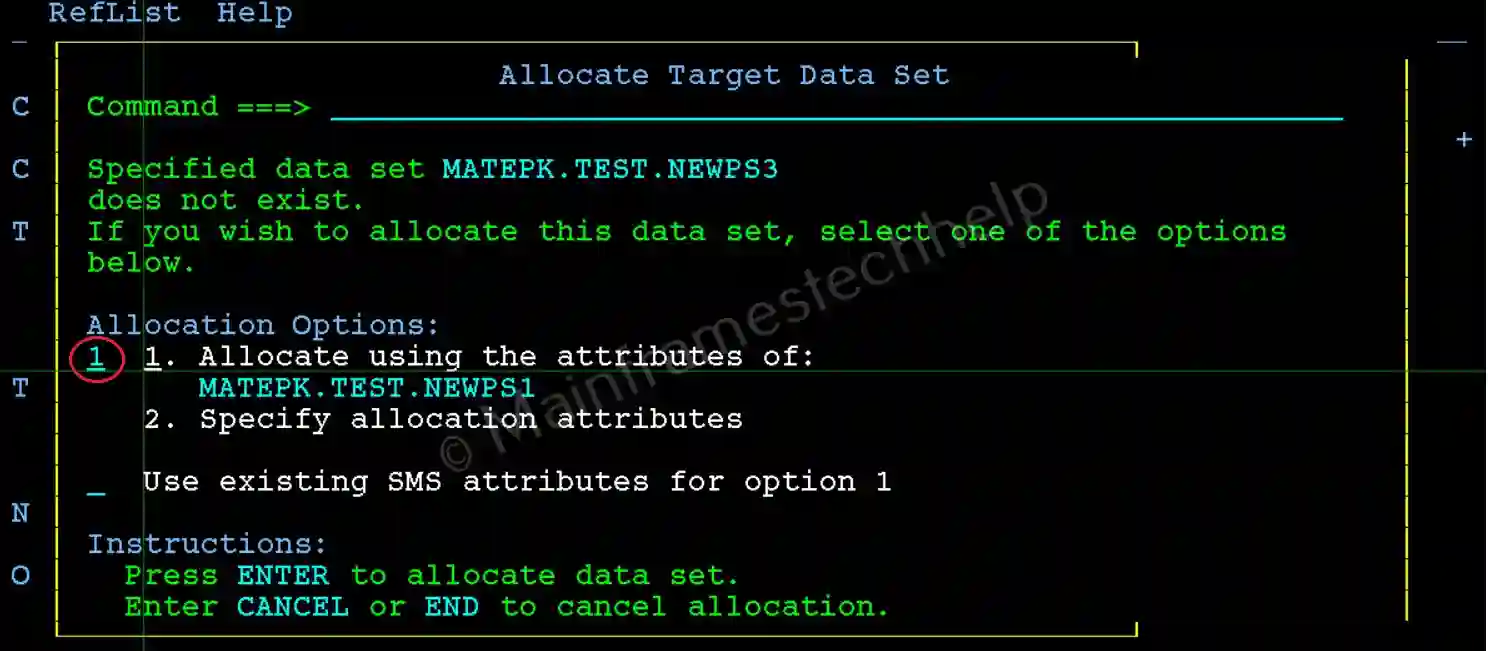
Step-3: Allocate Target Data Set popup apprears. Choose the best allocation option and hit Enter.
Step-3: If the move is successful, "Data Set - Moved" displays on the right-top corner. The member moves from source PDS.

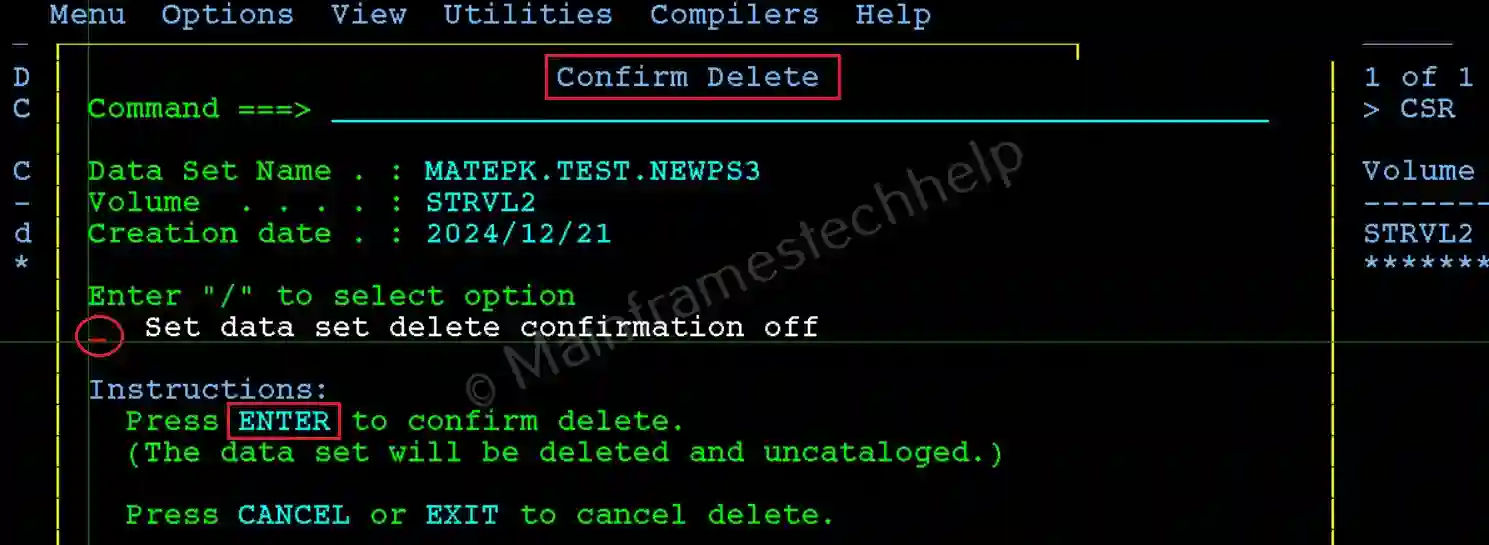
Delete PS -
Step-1: From the Data Set List Utility screen, Enter "D" (Delete mode) infront of the PS file name.

Step-2: The popup panel appears and asks for the delete confirmation. Hit Enter to confirm the deletion.
Step-3: If the delete is successful, "Data Set deleted" displays on the right-top corner.
