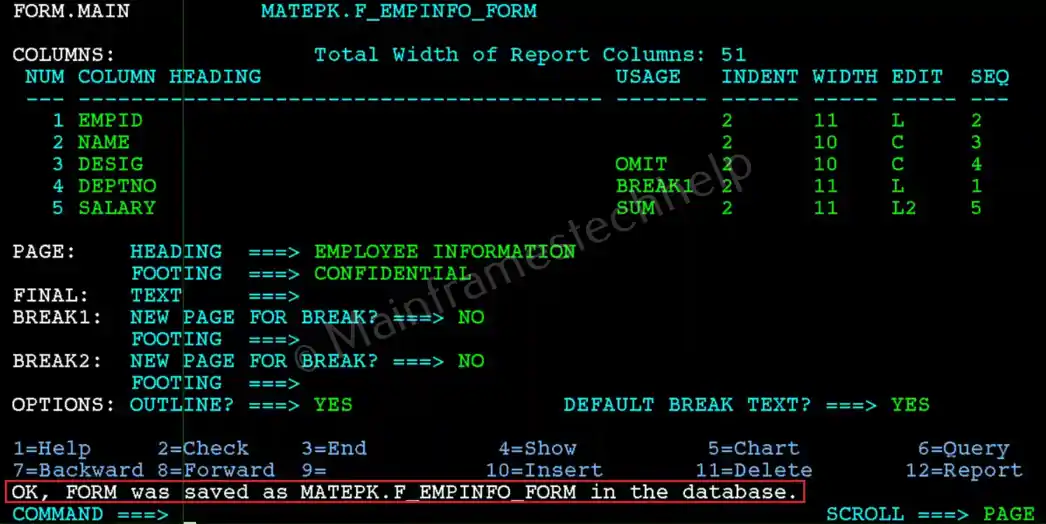
Create and Save Form
QMF has included a default form in all examples. If you would like your report to appear more formal — with descriptive column headings, a title at the top, subtotals for your columns, and other enhancements, you can create custom forms using the QMF form panels.
Create a Form -
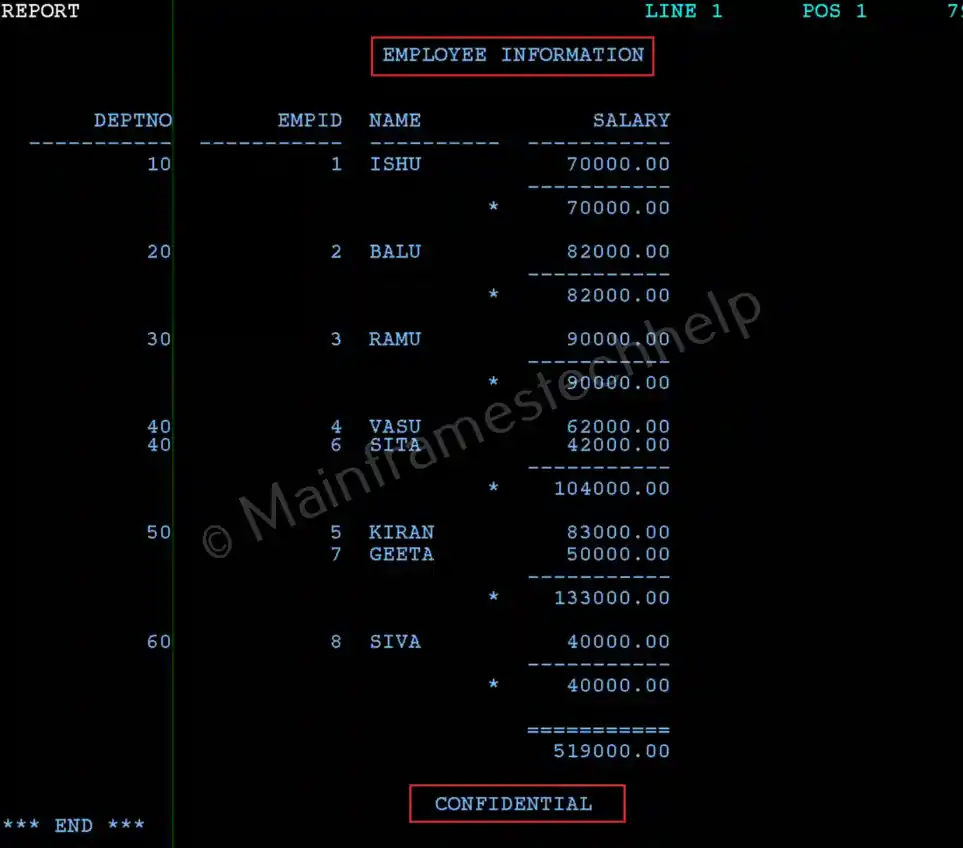
Scenario: - Create a new form to display the result group by DEPTNO and sum their SALARY.
- Saved Query - Q_EMPINFO_DETAILS
STEP-1: - Open the saved query in the query panel.
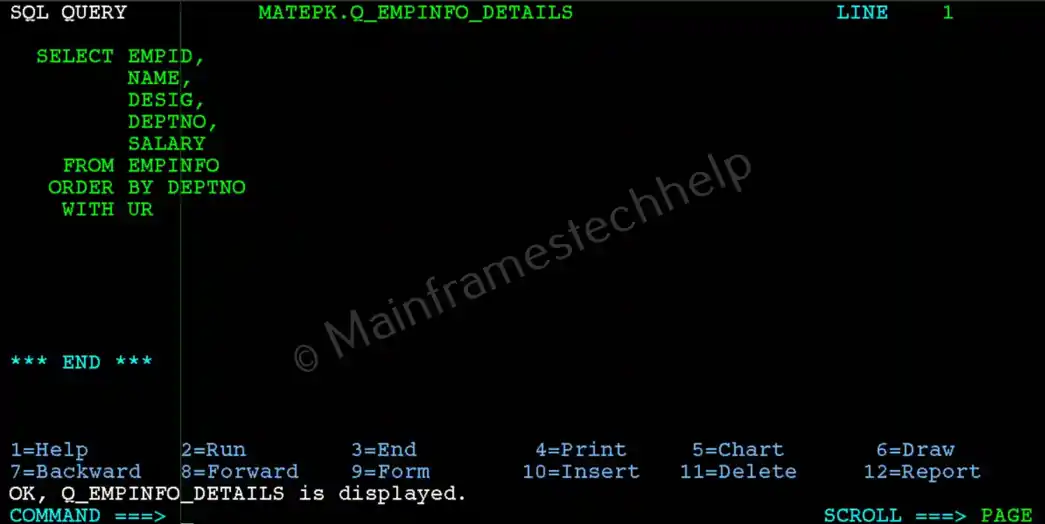
STEP-2: - Press PF2 to run the query.
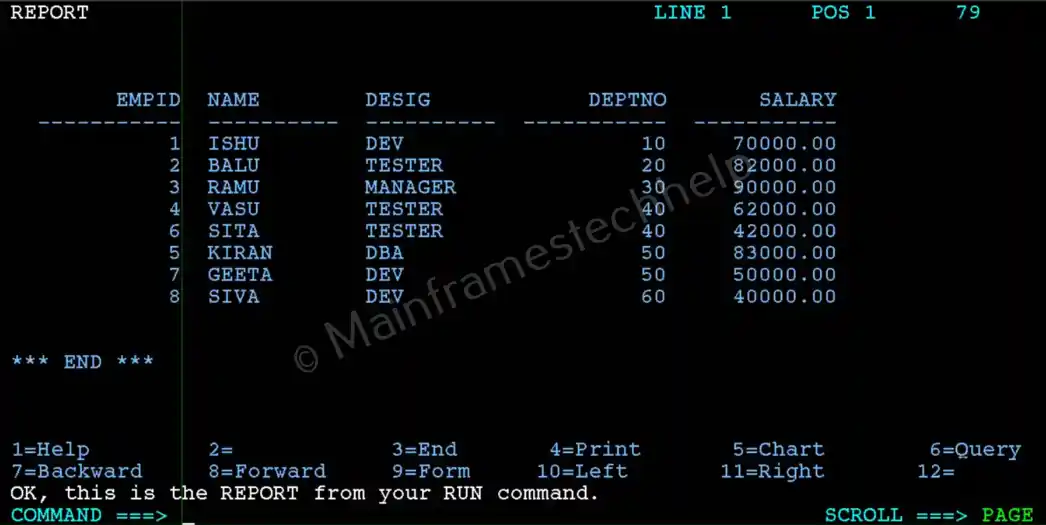
STEP-3: - The default form (FORM.MAIN) is automatically generated by QMF at the time the query is run. Press PF9 to open the default form format used by QMF to display the result.
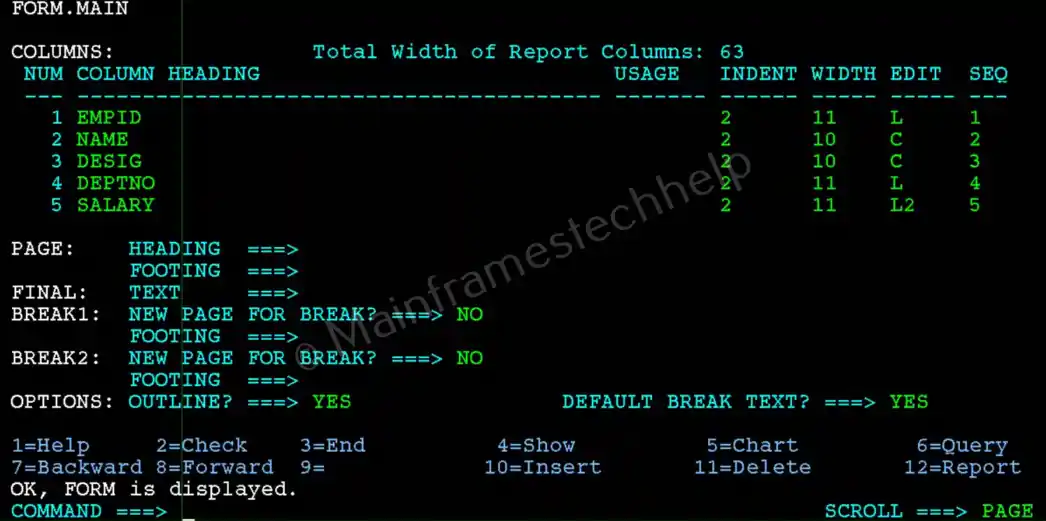
STEP-4: - Modify the required fields that matches to the requirement.
- COLUM HEADING - Used to change the column name in the report format.
- USAGE - Specifies the functions applied at the column level.
- BREAK1 - Breaks the report based on the values of specific column.
- SUM - Sums the values of the specific column. The other options are - AVERAGE (AV), COUNT (CO), CSUM (CS), MAXIMUM (MA), MINIMUM (MI), and PCT (Percent)
- OMIT - Ignores the column from display.
- WIDTH - Specifies the length of the column.
- EDIT - Specifis how values in a column are punctuated, if at all. Common edit codes are -
- C (Character Data)
- L (Numeric Data - decimal points and negative signs)
- D (Numeric Data - dollar signs ($) and separators (,))
- P (Numeric Data - percentage using the "%" symbol, as well as decimal points and negative signs)
- K (Numeric Data - minus sign for negative values, separators (,) for groups of three digits, and decimal placement)
- HEADING - Used to specify the custom header.
- FOOTING - Used to specify the custom footer.
We can change all the editable options in the FORMS screen, to change the display format.
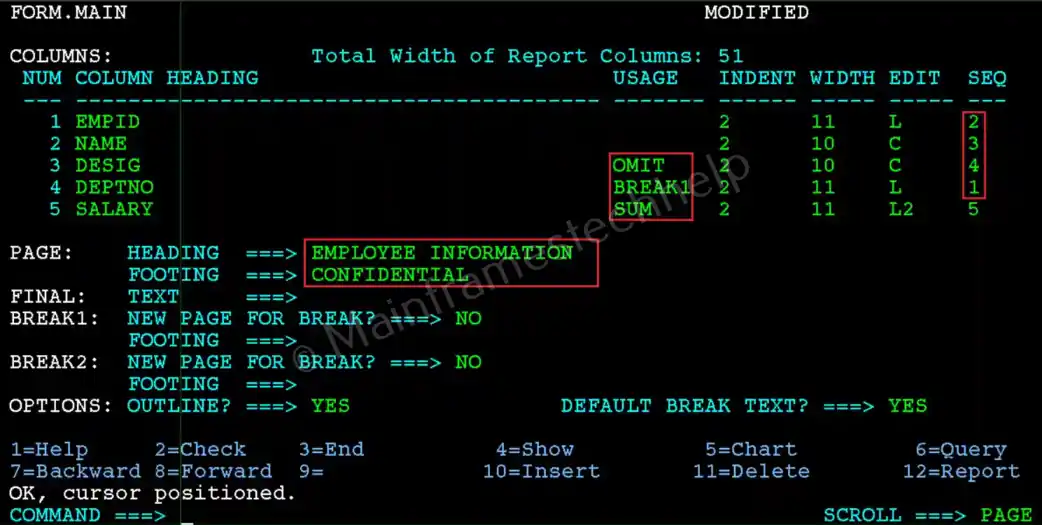
STEP-5: - Press PF12 to display the table data in the required format.
Save the Form -
Saved from are used to display the table data in the filtered format.
Scenario: - Save the new form.
STEP-1: - Press PF9 to return back to the FORM.MAIN panel from Report panel.
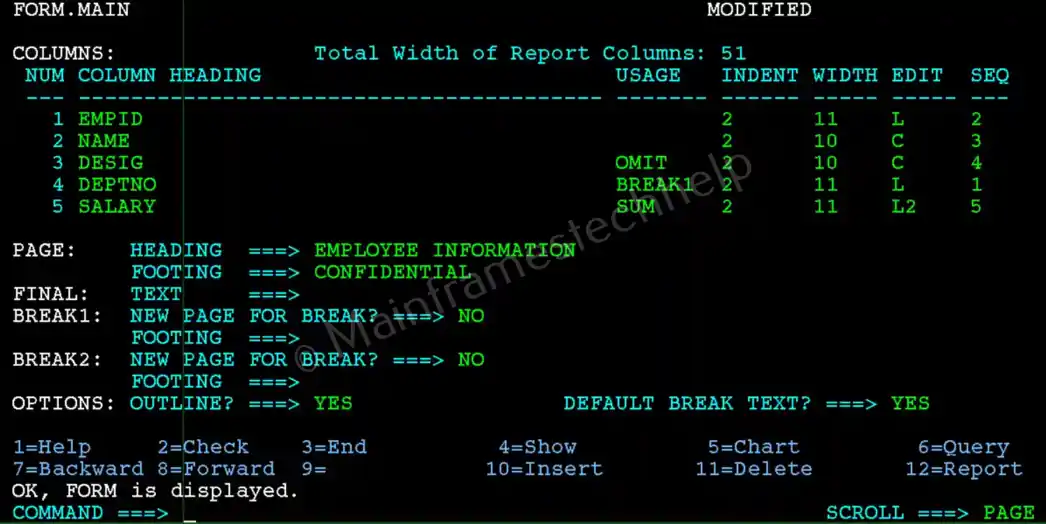
STEP-2: - Enter any one of the below command to save the query and press Enter.
- EXPORT FORM AS form_name
- SAVE FORM AS form_name
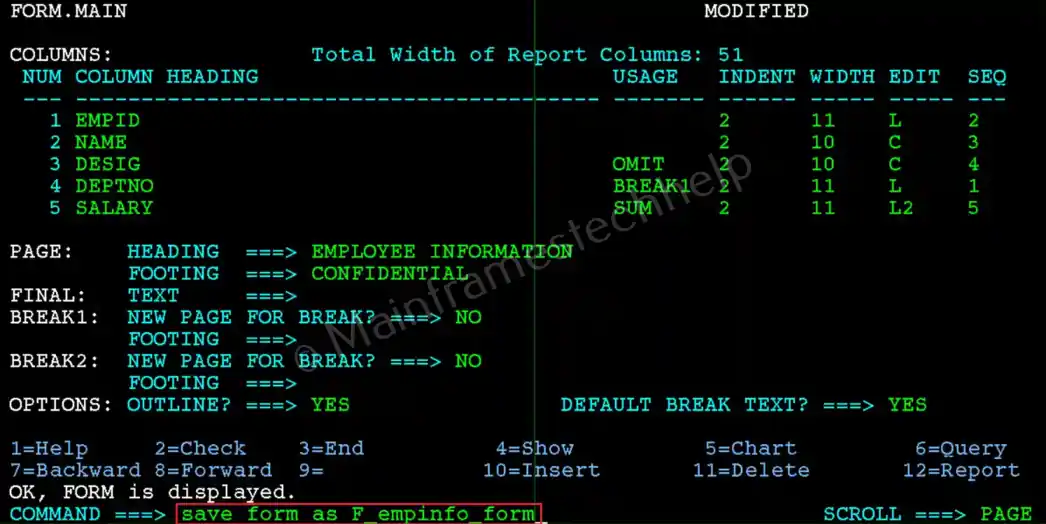
STEP-3: - Form is saved in the database with the name provided with userid before it. It shows like userid.form_name.
